Category Archives: guides

Pet-Specs

Dear Pike,

I am a level 65 hunter named Syaoken on the server of Shandris. Questing and leveling has been going quite well for me, but, I’ve ran into a small problem… my pet. I tamed a Frostsaber Pridewatcher from Winterspring, her name is Sakura. But, the problem I am having is I don’t know the best way to train her with skills. I don’t know to give her the best stam or best armor. Of course I gave her the highest growl I could and also claw (rank 9). I don’t know if the highest stam, highest armor, or even the resistances, are the most important. I just tried cobra reflexes for the first time and she kills so much faster. But, could you give me your two cents on the matter?

Thank you,

– Syaoken

Heya Syaoken,

The great thing about spec’ing your pet is that a respec is only 10 silver and it resets really quickly. For this reason, many hunters find themselves spec’ing their pet from situation to situation.

This is what I would do in your given situation:

First of all, the active skills. For a cat, I’d say max level Growl, max level Claw, and max level Dash. That is really all you need in terms of the active skills. Growl holds aggro for solo-play, Claw is going to be your focus-dump move, and Dash means you and your pet can kill stuff quicker!

After that, you want the passive skills. Max level Avoidance and Cobra Reflexes are both a must. Avoidance is going to be huge in determining your pet’s survivability and Cobra Reflexes does provide higher DPS overall.

Next is stamina. Max that out because in the long run, Stamina is going to do a lot more in boosting your cat’s survivability than armor will, because armor only protects against physical attacks whereas stamina protects against magical as well.

Now we have a choice, you can dump your remaining points in armor or spread it out over some resistances. Resistances are very good if you know you’re going to be doing a lot of stuff in places with certain types of damage. You can also put some points in resistances and some in armor and it will work out nicely.

This is how I have spec’d my cat Locke for Karazhan/many Outlands heroics:

Growl Rank 8
Dash Rank 3
Claw Rank 9
Avoidance Rank 2
Cobra Reflexes
Great Stamina Rank 11
Natural Armor Rank 3
Arcane Resistance Rank 2
Fire Resistance Rank 2

This uses 349 of his 350 total training points and has worked just fine for me in early raids/heroics.

This is how I often spec Tux, my PvP/solo pet:

Growl Rank 8
Dive Rank 3
Claw Rank 9
Screech Rank 5
Avoidance Rank 2
Cobra Reflexes
Great Stamina Rank 10
Natural Armor Rank 3
Fire Resistance Rank 2
Shadow Resistance Rank 2

Now you will notice that he is a little more complicated because he is an owl, and I’ve taken advantage of that by training him both Claw and Screech. This is because Screech is very handy in soloing and in PvP but on occasion I will take him into an instance and turn on Claw. (While soloing: Growl/Screech/Dive, while PvPing: Screech/Claw/Dive). The Shadow and Fire Resistance is because you run into a lot of warlocks in PvP who like to DoT everything. =P

You will notice I had to sacrifice a point in Great Stamina to make up for Screech; to me, that is okay because owls by default have slightly more health than cats. Plus, I am usually wearing my PvP gear in a PvP situation, so Tux benefits from my additional stamina. But, it’s all a matter of personal preference. Keep in mind that the higher ranked skills cost many more points than the lower ranked ones, so sacrificing the highest rank of something will often get you enough points for something else that you want.

For your Sakura specifically… I would say, first get her Avoidance and Cobra Reflexes, then max out Growl, Dash, and Claw, then max out Great Stamina as much as you can, and then see what you have left and decide whether you want to try and spread the remaining points out through resistances or dump it into Armor.

Again, the great thing about pet-spec’ing is that it’s very flexible and cheap to mess around with it, so experiment and see what works best for you.

Good luck!

-Pike

Reproducing this here because I thought it would make a great guide! I have admittedly edited my reply up a little because I realized that I regrettably sent it on its way with some errors. Good luck to you, Syaoken, and I would check out Petopia and WoWHead’s Pet Training Calculator for more on this topic.

So You Want to Play a Hunter? Part 2

Note: I’ve disabled all add-ons on this character, just for consistency!

So you have picked your race, made your new toon, and spawned as a level one hunter. (Maybe on a certain server to /wave at some fellow bloggers, but that’s beside the point!)

First thing’s first, move things around the way you like them. Me: I move Auto Shot to “2” and Raptor Strike to “3”, and racial abilities (such as Gift of the Naaru) move to the side. You can unlock and lock the action bars under Options -> Interface, which is also where you can add more action bars.

I also move my quiver over the the left-most bag slot.

There we go!

Now you accept your first quests and start shooting things. Now, there are ways to kite right from level one that will ensure you rarely get hit. Myself, I’m going to say that if you have never played a hunter before and are just starting out, you don’t have to worry about being perfect at this point. So if your character pops in an “accidental melee” or two, don’t beat yourself up over it… anyways, it’s good to have that skill when you learn Wing Clip later.

However, you should never have to use Raptor Strike. It’s true!

Get as far away as you can from what you want to shoot and still be able to use your Auto-Shot. Typically the Auto-Shot icon will be red or otherwise grayed out if you can’t use it. Once you are at maximum range, fire away!

Now, you have a couple different options here to keep your mob decently at range at this point. The easiest method is to simply back up. Now remember that you cannot fire your Auto-Shot while moving, but you will notice that as the mob gets close to you, it will typically pause for a bit to attack, and that’s when you can back up to regain some range and pop in an extra shot– often enough to finish it off, at these early levels.

If you are feeling a little more adventurous, you can try your hand at strafe-kiting. To strafe, press the Q and E buttons. By strafing and then occasionally stopping to shoot, you can typically keep the enemy at range.

Feel free to practice these two methods and remember, don’t worry if you get hit, it’s not a particularly huge deal at level one, after all!

Go turn in your quest once you’re finished up. When picking your first quest reward, remember that hunters cannot wear mail armor until level 40, so you will want to stick with leather.

By now you should have ding’ed level two, so do your little quest that takes you to the hunter trainer, and see what they’ve got for you to learn!

At level 2 you learn one spell: Track Beasts. Pop it on as soon as you learn it by way of the “tracking” button by the minimap, you can right click on it to select what you are tracking.

Your general strategy will remain the same until level 4, when you learn Aspect of the Monkey and Serpent Sting. Pop on Aspect of the Monkey and keep it on– you will want an Aspect on at basically all times from here on out. Serpent Sting is going to be your opener in most solo situations for the majority of your hunter career (once you hit the 60s you will probably be using it less and less; possibly not at all.) Remember not to use it if you are going to be trapping, though– because DoTs will break your trap. But you don’t have to worry about that for a while yet.

So at level four, your strategy will be to get at max range, open with a Serpent Sting, and practice keeping the mob away from you.

See? No Raptor Strike!

Oh, and don’t forget to keep tabs on your ammo, and buy some if needed! You can buy some at a General Supplies vendor. Many first-time hunters forget about Ammo and wind up Ammo-less mid-quest. Don’t let it happen to you! *taps chalkboard with stick for emphasis*

Once you get to level five, you get to choose your professions. The typical money-makers are skinning/herbalism and skinning/mining. (You can also opt for herbalism/mining but you can’t track both things at once– then again, as a hunter, you will usually be tracking non-profession things anyway.)

If you opt to go for a crafting profession, your three best bets as a hunter are probably leatherworking, which grants you the ability to make your own gear (including mail later on), engineering, which lets you make your own ammo, guns, and Goblin Jumper Cables (as well as a variety of other toys), and alchemy, which allows you to make your own elixirs and potions. All of the other professions (with the exception of tailoring, unless you are a bag-junkie or something) can also provide some sort of benefit to a hunter but the three mentioned are your best bets.

While you’re at it, it would be a good idea to pick up First Aid, which will be very handy for healing yourself as you quest, and even for backup healing your pet. Cooking and fishing both have benefits (and their products can be used as pet food!) but I don’t see them as being particularly critical right off the bat, especially because food is so easy to attain most of the time.

Well, that does it for this installment of “So You Want to be a Hunter”. Leave me your tired, your poor, your comments and questions if you’ve got any!

Oh, and lastly, to the person who got to my blog via the search term “how can i play Ocarina of time with a steady shot on the keyboard”

So You Want to Play a Hunter? Part 1

Introduction:

So you think you want to play a hunter, do you…?

Are you willing to accept the fact that you are going to be playing the most played class in the game and as such you will have to work hard to distinguish yourself if you want to stand out and prove yourself?

Are you willing to accept the fact that there are a lot of people who have given hunters a bad name and as such you will often find yourself in the position of being the WoW-equivalent of the kid who was picked last in gym class?: “Hey, there’s a hunter in LFG.” “…” “Yeah, we’ll find someone else.”

Are you willing to accept the fact that a lot of people are going to assume you don’t know how to do your job(s)? Most people assume that mages know how to polymorph and rogues know how to sap. Yet in my experience… most people assume that I do not know how to trap, at least not properly. You have to show that you can.

Are you willing to accept the fact that a lot of people out there think that you are an overpowered and/or easy-mode class, and are you okay with being ribbed for it?

And despite the fact that you are often viewed as the easy-mode class, do you realize that you are going to have to do an incredible amount of micromanagement? Precisely timing your shot rotations. Controlling your pet. Keeping your pet alive. Chain-trapping. Kiting. Watching yours and the party’s aggro. Doing massive amounts of DPS. All at the same time. Hunters are deep. Deeper than a lot of people will ever give you credit for. Are you prepared to find your own pride in your class because many other people will not give you the luxury of telling you themselves?

Are you prepared to give up a bag slot for a quiver or ammo pouch? Prepared to spend extra time going out and taming new pets so you can keep your pet skills up? Prepared to forego rested experience in favor of leveling up with your pets if you want to level up two at a time?

And perhaps most importantly, are you prepared to have an absolute blast?

If so, read on…

The Birth of a Hunter:

So there you are, at the character selection screen. Maybe you’ve already got faction picked out, maybe you don’t. What race is best for your newfound hunterness? Well before I go any further, I want to say that honestly I think you should pick the race you think you’ll most enjoy playing. Racials can be handy but in the long run the difference they make is usually not particularly huge. But here are the racials…

Alliance:

Draenei: Draenei hunters get Heroic Presence, which increases their chance to hit and also their pet’s chance to hit by 1%. That might not seem like much, but it is actually going to be quite handy later on when you’re trying to reach the hit cap, and of course, this is basically the only way except through the Animal Handler talent that you can increase your pet’s chance to hit. Draenei also get Gift of the Naaru, meaning they can heal themselves or their pet in a tricky situation (I imagine a Mend Pet + Gift of the Naaru combo is very useful in emergencies). An overall solid race choice in my opinion.

Dwarves: Gun Specialization gives Dwarves an extra 1% crit when using a gun. This is quite handy, but on the other hand, if you wind up running into a really nice bow or crossbow that you’d rather use, then this racial becomes a moot point. Stoneform is going to come in super handy in PvP because it will remove a rogue’s poisons, a warrior’s bleed effects, and a hunter’s stings. It also works in some PvE situations (for example, Moroes’ garrote, or annoyingly long-lasting diseases). Again, a solid choice.

Night Elves: The “Night Elf Huntard” stereotype alone is enough to drive many long-time WoWers away from this option, and to be honest they’re not missing much: while the Shadowmeld/Stealthed-cat combo is fun and can be quite effective, I myself have never found much of a need to teach a cat Prowl and I imagine most hunters would be in a similar situation. You also get a slight dodge increase (reasonably helpful in PvP), oh, and you can brag about getting back to your corpse faster when you die. *cough* Myself, I do have to say that I like night elves, because they have silly ears, and because I like proving people wrong when they assume that I am “just another night elf huntard”. (In PvP too; nothin’ makes the hordies mad like losing to a night elf hunter.) But they are probably the weakest choice for an Alliance hunter in terms of racials.

Horde:

Blood Elves: These guys have Arcane Torrent and Mana Tap which can be pretty decent against casters or when you’re low on mana. Really that’s all you’ve got to help you out though, in terms of racials, and these spells depend on you being close to your target which you probably won’t be most of the time. Blood elves do also get slight magic resistance which they can share with their pet, though.

Orcs: Orcs have a reputation of being the best choice for a hunter, period, which is why you see so many orc hunters running around (I do, anyway), and that reputation is well-deserved. Blood Fury is going to provide a very nice Attack Power buff (282 AP at level 70) which your pet will also glean some benefit from, Command is going to increase your pet’s damage by 5%, and Hardiness gives you an extra 15% resistance to stun effects (super nice in PvP). You really can’t go wrong with orcs.

Tauren: Tauren get a health boost (which in turn gives your pet a slight health boost) (thanks for the correction Sonvar!), Nature Resistance like Night Elves, and War Stomp, which can be quite useful when trying to get back into range. Overall the tauren racials really aren’t as hunter-helpful as some of the other races but they’re also not too bad.

Trolls: A solid choice for a horde hunter (though probably still second to orcs); trolls get Bow Specialization so they get an extra 1% crit with bows, as well as the ability to slightly increase attack speed (Berserk) and a beastslaying bonus which is useful for soloing or certain instances like Underbog. Again though, remember that if you wind up using a really nice gun or crossbow then your Bow Specialization becomes useless.

Once again, overall, I think that if one feels drawn to a certain race because of their backstory or the way they look, then by all means, play that race, even if the racials aren’t the best. My own current three highest level hunters are a night elf, a tauren, and a blood elf, and if you asked me, I’d say those are the three “weakest” races in terms of hunter racials. And yet I adore playing those characters because I have stories for them. Don’t be afraid to play whatever race you want.

Well, that sums up our first segment of “So You Want to Play a Hunter?”. I imagine this will be a very long-running series because I have a lot to cover, and a lot of

you guys left TONS of comments in my “Request for Comments” post, which shows me there is more of a demand for this type of thing than I initially thought. Got questions/comments? *points at Comment Box* fire away!

Stats for a Hunter: Part 2

A while ago I whipped up a guide called “Stats for a Hunter”, where I discussed the “main” stats, such as agility and stamina, and their importance (or lack thereof) for hunters.

I had a couple requests to add to it with Attack Power, Crit Rating, and Hit Rating, and that has been my plan all along, so here we go:

Attack Power:

Attack Power effects how much you will hit for with each shot. 14 Attack Power will increase your base DPS by 1. Oh, and Attack Power typically applies to both Melee and Ranged (unless otherwise specified.)

Now remember, one point of Agility will also give you one point of Attack Power, as well as some crit. This is why many hunters, myself included, prefer to gem and enchant themselves up for agility rather than Attack Power. However, as always, use your judgment. Many times an AP gem or enchant will give you much more raw AP than the Agi gem or enchant; at the expense of the crit that the agi will give you. A good example would be your two-handed weapon enchant. You are either going to want Savagery (+70 attack power) or +35 agility on it. Which one is better? …well, it depends. I tend to stick with the agi myself, because I’m a crit fiend, but few people will fault you too much for Savagery especially if you are very low on AP for some reason (unless you are a Survival hunter, in which case you had better be enchanting for Agi! =P)

I did once write up my own thoughts on why I’m more of an Agi fan over AP, so feel free to take a look at that if you want more info.

Crit Rating
:

Critical Strike Rating does what it says on the tin: it improves your chances to score a critical strike: an attack that does twice your base damage. At level 70, the chance to crit increases by 1% per 22.08 crit rating.

Now crits are delicious, not only does the crit itself do a ton of damage, but it lets you use Kill Command, it gives your pet a ton of focus (if you are spec’d for that), and your pet can in turn use that focus to score its own crits and proc frenzy/FI/etc. if you are a Beast Master. It’s pretty plain to see why I’m addicted to crit.

Don’t forget that agility will also get you some crit, although not quite as much as “pure crit rating”. So it’s sort of like the opposite of Attack Power. You’ve got Crit on one end, Attack Power on the other, and Agi in the middle. Agi is a nice middle ground, gets you a little of both, and scales with Blessing of Kings which is why so many of us opt to stick with Agi when possible.

Hit Rating
:

So what’s this crazy thing called hit rating that you maybe saw a little bit in old-world Azeroth but is all over the place in Outlands?

Well, hunters, do not underestimate the importance of hit rating.

You know when you shoot something and you “miss”? Yeah, you just lost a bunch of DPS as well as the chance for a possible crit which, as I said before, does a ton of great stuff. How can we fix this?

Here’s a little background info. We are hunters, and our ranged attacks cannot be parried, blocked, or dodged. We can miss, though. By default, at level 70, we have a 9% chance to miss against a level 73 raid boss. That 9% chance can be reduced to almost nil with enough hit. It takes 15.77 hit rating points to gain 1%, so if we want that full 9%, we need 142 hit rating points. 142 is the magic number (the meaning of the life, the universe, and everything + 100 after all) and you want to get that or as close to that as you can get.

Hitting 9% more often is basically a 9% damage increase, which is huge. This is why we learn to love the hit.

Once you get to 142 hit, obtaining any more than that is useless and you can start focusing on other stats. Going over isn’t going to hurt you but it also isn’t going to help you at all. On the other hand, it might be good to be just a little over to give you a buffer in the event of maybe getting some awesome new gear with no hit on it. It all depends on how much min-maxing you want to do!

Oh, and there are some special things that can help you here, aside from gear. If you are a Survival Hunter, you probably put points into Surefooted, a talent which gives you a hit boost. Similarly, if you are a draenei, you have a slight increase to hit through your racial. In the former situation your hit cap is only 95, in the latter, it’s 127.

Now you may be feeling overwhelmed at this point, wondering how to keep track of this all and how you will ever be able to balance all of these stats, plus the “initial ones”, once you hit 70. Fortunately, it’s not that bad! You can make clever use of gems and enchants to help boost yourself where you may be lacking. When in doubt when it comes to new gear, you can always install and use one of my favorite addons, RatingBuster, which will easily summarize for you all the pros and cons of some new gear. (Don’t forget to take enchants and gems into account though– I’ve done that before– passed on something awesome because “Oh it’s not as good as my current thing”, then realized I wasn’t taking enchanting the thing into account. x_x)

Well, that’ll do it for now. As always, I love your comments and questions!

Hunter Kindergarten: Intro to Shot Rotations – The Motion Picture

As promised, here is Pike’s Official Intro to Shot Rotations Movie!

Couple things before I begin:

1.) Kill Command is a move that you can use anytime you crit. You learn it at level 66, not level 68 like I said in the movie… sorry about the oral typo there. /blush

2.) I apologize that my voice sounds somewhat congested, my allergies are pretty terrible this time of year.

3.) My Kill Command is keybound to alt-tilde, hence the sound of a frantic jamming of keys anytime I use it.

4.) I was originally going to have a quiet background music track as well (because honestly you just can’t go wrong with The Safety Dance) but I decided it was too distracting. So hopefully just my voice by its lonesome can hold your interest. =P

Enjoy and hopefully you can learn something from this, I worry that maybe it’s not the clearest video:

[youtube=http://www.youtube.com/watch?v=lxLGFv1skh0&hl=en]

A Hunter's Guide to Karazhan Bosses

Greta said she was looking for some guides on being a new hunter in Karazhan. Now perhaps ironically enough, I’ve been wanting to write a guide like this for some time, I just haven’t gotten around to it yet. But now I’ve got a bigger motivation for it, so… here goes nothin’!

Disclaimers before I begin:
1.) Exalted with the Violet Eye notwithstanding, I’m still a noob who didn’t set foot in Kara until a couple months ago.
2.) Different guilds/groups do things different ways.
3.) This guide is not going to cover Netherspite because I haven’t downed him yet. (See, told you I was a noob.)
4.) Some of the sample movies are not exactly stellar because they are often the first time we downed that particular boss so we were kinda shaky. But a shaky movie is better than nothin’, right?

All that said, in the voice of Barnes… “And now, on with the show!”

A Hunter’s Guide to Karazhan Bosses
By Pike

Attumen the Huntsman


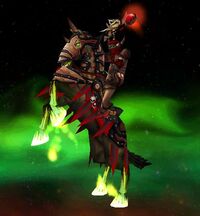
“Come Midnight, let’s disperse this petty rabble!”

A fairly easy guy who is basically a tank-and-spank, although poorly geared groups can still wipe on him pretty easily, so beware of that. You begin with just his horse, Midnight, which you is what you will be attacking at the beginning of the fight. Eventually Attumen will come out and join up with Midnight and you’ll fight them as a single entity. Really the two most important things to remember are:

1.) Stand on the horse’s butt when the two merge. Okay, not literally. Stand about as close to the horse’s butt as you can get and still shoot. This is still pretty close since the dead zone is gone now. Otherwise he will charge you and bad things will happen.

2.) Upon the merge, do not attack for a few moments to allow the tank to re-establish aggro. A misdirect may be in order, but check with the tank first.

Other than that, this is a straightforward fight that should not cause many issues. If the DPS is a bit on the short side then it can develop into a long fight, though, so have a Mana Pot or two ready just in case. (Use it when you get down to about 50% mana.)

Sample Movie
: I don’t have one available one for this fight. Sorry!

Possible Hunter Drops
: [Gloves of Dexterous Manipulation] (leather); [Stalker’s War Bands]; [Steelhawk Crossbow]; [Worgen Claw Necklace]; [Schematic: Stabilized Eternium Scope] (engineer-only-BoP)

Moroes


“Hmm, unannounced visitors? Preparations must be made.”

Depending on your group makeup, this is the fight you may have to do some trapping on. Basically Moroes is accompanied by four people (who are randomly picked each time from a pool of six) and you have to take out all five; this, of course, means lots of crowd control while you take them down one at a time. Most of the time, you will not be asked to trap for very long because if all the DPS is focused on a single mob then all of them (except Moroes) go down pretty quickly, and most groups opt to take out the trap before Moroes to prevent any issues. Don’t worry too much about it; wait for the trap cooldown before the pull starts, make use of your space in the room, and you should be good.

Basically the only other thing to worry about in this fight is that Moroes might toss a heavy-hitting DoT on you called Garrote. There’s not a lot you can do about this except make sure the healers know about it– so as not to bug them, check before the fight if they want you to maybe call it out or if they’ll know/somebody has Deadly Boss Mods.

As always, watch your mana, keep your traps out the way of where everybody else is fighting, toss more than one distracting shot on your mob just to be safe (they really like to lose aggro on you and go after the healer instead), and you should be good to go. Now is a good time for a pull shot macro if you don’t have one so you don’t accidentally break your own trap.

And yes, Moroes has a tendency to disappear and re-appear, it’s normal.

Sample Movie
: Entelechy vs. Moroes

Possible Hunter Drops: [Edgewalker Longboots] (leather); [Emerald Dagger] (if you’re into one-handers– also please do not roll against a rogue on this)

Maiden


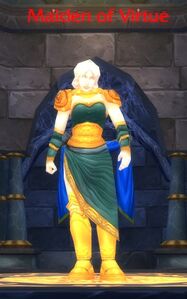
“Your impurity must be cleansed!”

I won’t lie, Maiden can be tough, but once you figure her out she’s not that bad. Also: pally healers will make your life super easy in this fight thanks to Blessing of Sacrifice. Give yours a thank-you hug today!

Our guild does it like this: before you initiate the fight, everybody runs around the room she’s in, hugging the wall, and finding a spot that isn’t particularly close to anybody else. Then, after the tank engages the fight, everybody moves up to the bottom step of the little platform she’s on and DPS’s from there. Every so often she will toss Holy Fire on somebody which will kill them pretty quickly if they’re not cleansed; again, you will want to check with your healers or the “cleanser” beforehand if they want you to call it out or if they will be notified some other way. Also every so often Maiden will stun everybody that isn’t in her little inner circle… just sit it out.

Keep Mend Pet on your pet the entire time because he is going to be taking some damage the whole time, and you should be all set. (Now is a great time to mention that you will definitely want to look into getting at least a couple ranks of both Arcane and Fire Resistance for your pet, those are the types of magic you will be running into most in Kara).

Sample Movie: Entelechy vs. Maiden

Possible Hunter Drops: [Bracers of Maliciousness] (leather); [Gloves of Quickening]

Opera: Big Bad Wolf


“All the better to own you with!”

Opera works like this: there are three possible different boss fights you can do here, and they are random and you won’t know which one you’ll be doing until you actually do it. There are tricks that will let you figure out which one it is in advance (pally bubble, hunter feign death, etc.) but other people just run in full-speed-ahead, so you’ll have to find out how your own guild or group likes to do it.

The Big Bad Wolf fight is a fun one and probably my favorite of the three Opera events. For the most part it’s a tank’n’spank with a twist: Big Bad Wolf will randomly turn people into a Little Red Riding Hood Gnome and chase them around the room, and if he catches you, well, you’ll die. But guess what, you’re a hunter! When you turn into a little gnome, just Feign Death. He’ll forget about you. That’s all. You’ll still be a gnome and can’t attack, but at least he won’t be attacking you.

If the Feign Death is resisted or if it’s on cooldown: run around the room in a pre-designated way (I’ve always gone counter-clockwise myself); hug the wall and do not stop running until you aren’t a gnome anymore.

That’s it on him, most of the fight will be spent doing pure unleashed DPS so just be careful not to grab aggro from the tank.

Sample Movie: Entelechy vs. Big Bad Wolf

Possible Hunter Drops: [Big Bad Wolf’s Paw] (if you’re into one-handers); [Wolfslayer Sniper Rifle] (aka Sexiest Thing You Will Get Out of Karazhan); [Beastmaw Pauldrons] (will drop from any Opera Event)

Opera: Romulo and Julianne


“Wilt thou provoke me? Then have at thee, boy!”

This is probably the most technically difficult Opera fight but as such I find it to be very intense and rewarding. Basically you fight Julianne first, then Romulo, then both of them at the same time. Sounds easy right? Well here’s the catch: During the last phase, Romulo and Julianne both have to die within ten seconds of each other or they will rez each other.

This is how my guild does it: We have two tanks (as you hopefully will too), throw one each on Romulo and Julianne, get one down to 15% or so, stop all DPS, unleash a bunch of DPS on the other one, and then finally come back to the first. We’ve got this pretty “down” at this point and we can usually have them dying within three or four seconds of each other.

All you really have to remember is to take your pet off of one and put it on the other when the time comes to switch DPS.

Sample Movie: Entelechy vs. Romulo and Julianne

Possible Hunter Drops
: [Blade of the Unrequited] (again, more of a rogue thing); [Romulo’s Poison Vial] (personally I think there are better trinkets out there unless you need the hit); [Beastmaw Pauldrons] (will drop from any Opera Event)

Opera: Wizard of Oz


“Will she survive? Will she prevail? Only time will tell.”

Wizard of Oz is pretty straightforward, you have a bunch of characters that need to be killed and the group you are with will tell you what order they want to accomplish this in; Dorothee and Tito are typically the two you will want to dispose of first. After all these guys are taken care of, the Crone will show up, and she’s also pretty straightforward so long as you don’t stand in her tornado. Pretty simple overall.

You may be asked to help chain-fear Roar via Scare Beast if you don’t have any warlocks or anything, but other than that you probably will just be DPS’ing.

Remember: don’t start DPS on the Crone until the tank has a hold of her. Misdirection works nicely.

Sample Movie: Entelechy and Blood and Tears vs. Wizard of Oz

Possible Hunter Drops: [Legacy] (aka Basically The Entire Reason You Are In Karazhan); [Beastmaw Pauldrons] (will drop from any Opera Event)

Nightbane


You can only fight Nightbane if you have somebody in your group who has a quest item who can summon him. Once he is summoned, he flies down and you begin the fight. As a hunter, you will often be asked to Misdirect on to the tank here, and every time he comes back down to the ground from here on out. The fight is mostly a tank and spank except that sometimes, Nightbane will summon Charred Earth, which means that a particular area of the ground turns red and does all sorts of horrible damage to you, so you want to get out of it by running to the other side of the wall– pretty straightforward. He also fears every so often, but it’s no big deal (unless he fears you into the middle of Charred Earth… just run really fast to get out of it.)

One important thing, though, is to keep an eye on your pet’s health, because sometimes Charred Earth will pop up underneath your pet and it does about 2000 damage every couple of seconds and there’s no way you’ll be able to keep him alive– so pull him back to you until it’s safe again.

Now, every so often, Nightbane will take to the air again, and a bunch of mobs will show up sort of in the middle and you’ve got to AoE them down. Mostly I just leave this up to the mages/warlocks/boomkins but I’ll try to help out with my Explosive Trap/Volley/Multi-Shot. When he comes back, remember to Misdirect onto the tank.

And, well, that’s about it for Nightbane! Not as scary as he looks originally.

Sample Video: Entelechy and some P

uGs vs. Nightbane

Possible Hunter Drops: [Chestguard of the Conniver] (leather); [Ferocious Swift-Kickers]

Curator


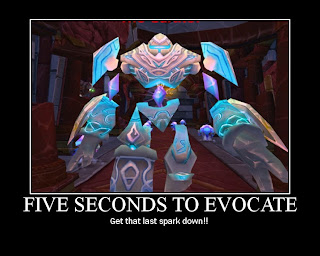
“Gallery rules will be strictly enforced.”

Oh Curator. He has been known to make grown hunters cry either tears of pain or boredom, depending on how well things are going.

Okay, overview on this fight: There are going to be these little sparks flying around called Astral Flares that need to be DPS’d down. (This can be made simple with an easy /target Astral Flare /cast Auto Shot macro.) Every two minutes or so Curator is going to Evocate and take twice as much damage as usual, that’s when the DPS should be focused on him. (But make sure there aren’t any more fuzzballs!) If you have this fight down then you should be able to finish Curator off on his third Evocate, though I’m sure it can be done even sooner.

Hunter Tricks I’ve Learned: Keep your pet on Curator the entire time so he can proc Ferocious Inspiration while you focus on the sparks. Oh, and don’t forget to conveniently use The Beast Within when Curator evocates; if you time it right you will have one ready at each evocation. (This is the secret to doing yards more DPS than anyone else in this fight, by the way). Also, you may opt to have Blessing of Salvation on this fight instead of Might or Kings simply because if the flares aggro on you, you just have to kind of sit there and take a bunch of damage while you flail around and do stuff like Raptor Strike, which is just embarrassing.

Arcane resist gear/trinkets (like the one you get from one of the Kara quests) will help here if you have it, otherwise it’s not a particularly huge deal.

Keep an eye on your pet and use Mend Pet as needed, and also keep an eye on your mana because it can be a mana-intensive fight.

I’m going to go ahead and toss this fight in a unique category known as “Hard to learn, easy to master”, because if your whole group is new to him you will probably wipe a bunch of times but once you figure out how to do it, it’s really pretty easy.

Sample Video
: (Note, this was made when we were still learning the fight and as such it doesn’t include any of the fun hunter tips I mentioned earlier): Entelechy vs. Curator

Possible Hunter Drops: [Gloves of the Fallen Hero] (Hunter tier 4 token); [Garona’s Signet Ring]

Shade of Aran


“I am not some simple jester! I am Nielas Aran!”

I dunno if this means I’m insane or not but this is my favorite fight in the dungeon. It’s crazy, it’s hectic, it’s hard, I love it.

Pet control is absolutely vital in this fight if you want to keep your pet alive the entire time. It’s difficult but it’s possible.

Here’s the deal with Shade of Aran: He has no aggro table. He randomly attacks anything and anybody including you and your pet. For this reason, watch for pet aggro and be ready to toss up Mend Pet at a moment’s notice. (If he is really feeling malicious he will kill your pet pretty easily but hopefully that won’t happen.)

He has a lot of special moves that require special action. Blizzard is going to throw beams of ice down around the edges of the room so you should be standing somewhere towards the center. Arcane Explosion goes like this: no matter where you are standing you will be pulled to the center. When this happens, immediately turn around and run to the wall. You are going to be moving really slowly unless you happen to be big and red at the moment; it’s okay, you’ll make it, just keep moving and bring your pet with you. This is vital. If you don’t take your pet with you immediately he will die from Aran’s explosion. Another trick: turn slightly to the right which will force your pet to the outside of you so he has even less of a chance of getting hit with the explosion.

Flame Wreath is a pretty infamous move of Shade’s where the room is going to be filled with fire and if you move, the raid will blow up. Not exaggerating. Do not move during Flame Wreath. You can keep shooting and you can keep doing your shot rotation, and it’s okay if your pet moves (though I don’t tell him to, just to be on the safe side), but do not move an inch until the fire goes away.

Partway through the fight elementals will show up which will need to be taken care of in some way; ask your group how they plan on doing this.

For many groups, it won’t be long after that Aran is going to sheep everybody. You really can’t do anything to get out of this but immediately after the sheep effect wears off he’s going to hurl a giant fireball at you so have a health potion, healthstone, or band-aid ready to save your healers a lot of grief. (Don’t forget Mend Pet). If you are super fast than you’ll have Aran down before he gets to this part, but I’ve yet to see that myself.

One thing that is always fun to do during this fight is to always have a Snake Trap in the middle of the room. Aran is going to see the snakes as targets to attack, which means he won’t be attacking the raid and will buy everybody a little extra time.

…yeah, see, told you it was a crazy fight. It’s so fun though. Just keep an eye on your pet and on your health/mana (be prepared to self-heal if needed, your healers will be stretched pretty thin), and don’t worry too much if you die at first, it’s a little hard until you really learn all the tricks Aran has up his sleeve.

Sample Movie
: Entelechy vs. Shade of Aran

Possible Hunter Drops: [Drape of the Dark Reavers]; [Rapscallion Boots] (leather); [Saberclaw Talisman]; [Steelspine Faceguard]

Chess Event

If you have never done this before than let somebody else take control of the King and the healers. Just move your piece around and attack things. Preferably the other king if you can get to him.

Sample Movie
: …

Possible Hunter D

rops: [Bladed Shoulderpads of the Merciless] (leather); [Fiend Slayer Boots]; [Girdle of Treachery] (leather)

Illhoof


“Ah, you’re just in time. The rituals are about to begin.”

So long as you have the AoE to keep the imps off of everybody, this is a straightforward fight that can get pretty long if the DPS isn’t all there so have Mana Pots ready.

Basically you are going to spend this fight DPS’ing Illhoof (sometimes his big imp buddy, too– check with your group to see how you want to handle him) but every so often Illhoof is going to “sacrifice” somebody and stick them in a circle of chains, and you want to get all your DPS onto the chains immediately to get that person loose, or they will die in about three seconds. Granted, the person in the chains can be there for quite a while with sufficient heals, but the longer the player is in there, the more Illhoof will get healed, hence why the fight can really drag on and on if your DPS isn’t on the ball. You can alter your Curator macro here to say /target Demon Chains which will make things quicker.

If you are being sacrificed there’s not a lot you can do and Feign Death isn’t going to help (there seems to be a rumor I hear sometimes that it will get you out of it– it won’t) so just calmly say that you’re being sacrificed (unless Deadly Boss Mods is announcing it) and wait it out.

Your pet might get hit sometimes, just toss Mend Pets on him as needed.

Sample Movie: Entelechy vs. Illhoof (aka “See What Happens When The Fight Drags On Forever”)

Possible Hunter Drops
: [Girdle of the Prowler]

Prince


“All realities, all dimensions are open to me!”

Probably my least-favorite fight in the the instance just because a lot of it is so random and out of your control. All it takes is a bad infernal placement to wipe the raid even if you were doing great up to that point. Regardless, there are things you can do to minimize the potential pain.

This is a pretty intense fight with three phases: during the first phase you really just have to worry about the random infernal drops and Enfeeble which will temporarily bring you down to 1 hit point unless you are standing at max range (which you should be, as a hunter). Don’t worry about it, your health will shoot back up after a few seconds. Usually a caster will have a raid symbol over their head as the person you have to stand behind during Enfeeble, as long as you are next to him or behind him you are good.

During Phase Two Prince starts chucking random axes at people and starts throwing DoTs on people, and during Phase Three he introduces even more annoying things like that. Fun fun!

Typically you will be standing sort of near the door and Prince will be tanked along the left wall because it minimizes crappy infernal placements as much as possible. You may or may not be asked to open with a Misdirect. Be very careful if you do this because he can see you almost at max range, so hit him with an Arcane Shot or something similarly instant cast the second you are in range, or he’ll see you first and come one-shot you. (Trust me on this one. …yeeeeah.)

If an infernal lands on your head or anywhere near you, you MUST move or you will die in about five or six seconds. When in doubt, follow the person with the raid symbol over their head, they’ve probably done it before.

If an infernal lands right next to Prince, you’re safe, but your pet is not. Recall your pet to you because you can’t Mend Pet him through it. It is better to have your pet alive and by your side giving you an extra 2% damage through Focused Fire, than having him dead and being unable to use him later on.

And once again check with your healers to see if you need to announce if axes on you or if they’ve got another way of being notified.

This fight is really very luck-based, so pray that the Infernals will be nice to you and hopefully you’ll be on your way to a shiny new helmet.

Sample Video
: Entelechy vs. Prince (kind of a bad movie because you can’t see a lot, and because I was still learning the fight so my pet died and then I died… but dang if the ending wasn’t epic. Longest 1% on a boss ever.)

Possible Hunter Drops: [Helm of the Fallen Hero] (hunter Tier 4 token); [Farstrider Wildercloak]; [Malchazeen] (but seriously, give it to the rogues/fury warriors); [Ring of a Thousand Marks]; [Sunfury Bow of the Phoenix] (not quite as good as Wolfslayer if you are BM and use a hand-woven 1:1 rotation).

Netherspite

Sorry guys, I’ve actually yet to beat this one because I’m fairly new to the game (didn’t start playing until after Burning Crusade and all) and because I refuse to be “run through” Kara by bigger guilds– we’re doing this the good ol’ fashioned way and I love it. But trust me, the second we get to him I will come back and edit it into this guide.

In the meantime, there have been a couple comments left about any bosses I didn’t cover, and Loronar wrote up a guide to them as well, which is very much worth a look!

Raid Mats/Consumables

Aside from the obvious full ammo pouch of bullets and the stack or two of Pet Food, this is what I usually bring for myself to a fresh Kara run:

[Super Mana Potion] x 10-15
[Super Healing Potion] x 5-10
[Fel Mana Potion] x 5
[Elixir of Major Agility] x 15ish
[Elixir of Major Mageblood] x 15ish
[Warp Burger] x 20
[Kibler’s Bits] x 20
[Sporeling Snack] x 20

And if I’m feeling adventurous, a [Flask of Relentless Assault] or two.

I try to have an Agi Elixir, the Mageblood Elix

ir, and a Warp Burger on me at all times, and Locke is always buffed with Kibler’s Bits or Sporeling Snacks depending on the fight/part of the instance. Just use your judgment.

[Elixir of the Mongoose] is often cheaper than the Major Agi one and will actually get you slightly more pure crit but I like the Agi myself because it stacks better with Kings and also gives me more AP than Mongoose. I wouldn’t fault you for using this one, though.

And please don’t forget your water.

Alright, there you go. And because according to my clock it’s taken me over three hours to write this post, I think I’m going to wrap things up. Greta, I hope that you found this guide to be a little helpful, go have fun in Karazhan! And as always, lemme know if you’ve got comments or questions!

The Leveling Beast Master

I’ve noticed that I’ve had a lot of Google hits from search terms such as “What should a BM talent spec look like at [insert level here]”. So I figured I’d toss out my idea of a leveling spec. Before I begin, note that I don’t really believe there is “One True Leveling Spec” (although there are some that are better ideas than others) and also that you will respec at 70. The following spec is not one that I’d go waltzing into heroics and raids with.

A Pike-approved Leveling Beast Master spec is going to look roughly like this:

This build is going to give you plenty of pet uptime without gimping you should you choose to do some lowbie instances.

Now let’s discuss why I did/didn’t take some of the talents.

Bestial Swiftness
: To be honest I don’t see this as being a particularly useful talent once you get Dash/Dive, but it’s a decent enough “filler talent” while leveling and certainly better than Pathfinding. (Do not let me catch you with Pathfinding.)

The Lack of Spirit Bond: While I can sorta almost see the case for Spirit Bond as a leveling talent, there are three big problems with it in my eyes: 1.) The amount of health it restores is miniscule, 2.) There are better places to put two talent points, and 3.) In the vast majority of cases, if something is killing you or your pet, it’s going to kill you anyway and Spirit Bond isn’t going to stop it. I have never found a need to spec into this talent. That said, it does have its devoted fans, so you decide.

Five Points in Frenzy: Many of you who have level 70 BM hunters, myself included, only have 4 points in Frenzy. The reason is because 4 points in Frenzy is something like 99% as good as 5 points in Frenzy (I can’t remember the exact theorycrafting but it was something like that) and there are better places to put that last talent point. However, for a leveling/grinding spec, there’s really not much of a better place to put that point so into Frenzy it goes. That said, I would also certainly approve of dumping that one point into Catlike Reflexes or maybe Animal Handler. I myself just have a thing for specs looking “clean”.

The Lack of Animal Handler
: Animal Handler gets a bad rap for being a noob talent like Pathfinding. “Increased mount speed? Noob!” What people forget to see is the increased chance to hit for your pet which is going to be an amazing DPS booster once you get into raids. At lower levels though, it’s not needed.

Ferocious Inspiration vs. Catlike Reflexes: If you are going to be an exclusively solo hunter and are not planning on doing any instances anytime soon and are looking for maximum pet uptime then I can see taking Catlike Reflexes instead. Otherwise, Ferocious Inspiration is the better choice because it’s going to increase the DPS of you, your pet, and everyone in your party. If you do opt for the Catlike Reflexes route, though, keep in mind that you’re not going to be keeping that talent at 70 if you plan on doing typical end-game stuff. Because once you get Go for the Throat and a fairly high crit rating, Ferocious Inspiration is going to be up almost 100% of the time and it becomes the vastly superior talent choice.

Improved Hunter’s Mark vs. Efficiency: This is sort of a debate for the ages among hunters of all levels. The general consensus is that one hunter in your raid should have IHM so the rest can take Efficiency. If you are leveling then you don’t really have to worry about that and it’s more of a personal choice. IHM is going to provide a sizable boost to your pet’s attack power which will help him keep aggro; Efficiency is going to decrease your downtime especially with the recent mana-regen nerfs and the fact that you won’t have Aspect of the Viper for a while. Neither is a bad choice and go with what you prefer. I myself have always chosen IHM, though, because I like the better pet DPS.

Your First Five Points:

A lot of people I know will make a hunter, level it to ten, and then ask me where they should put their first talent point if they’re going into Beast Mastery. The way I see it, there are two right answers to this question:

Endurance Training and Lethal Shots.

Endurance Training is going to start you into the BM tree right off the bat whereas Lethal Shots is going to take a brief foray into Marksmanship to pick up an amazing 5% crit before you head into Beast Mastery. What it really comes down to is if you’d rather get the Big Red Pet as soon as you can, or if you’re willing to delay it for five levels to give yourself a big crit boost. Both are acceptable goals in my eyes and as such I see either one as being the right answer. I myself have hunters that have gone both routes– though to be completely honest, I think I lean more towards the Lethal Shots route myself.

I should mention that if you are brand new to huntering and have something like a cat or other low-armored pet, it might be more logical to head into giving him more hit points right away. But don’t let that deter you from 5% crit if ya want it.

The Respec to 70:

So you’ve made it to level 70. Hooray! You want to stay a 41/20/0 Beast Master but you know that you’ve got a leveling spec right now and you want one that will get you into instances and then eventually heroics and raids. Well, as I said, I’m somewhat of the school of thought that there is no one true spec… but here’s what a typical level 70 raiding BM hunter spec should look like:

Important things to note about the change in specs:

Endurance Training is swapped out for Improved Aspect of the Hawk because it’s a big DPS booster and because in a raid your pet should not be getting hit; the tank will be. This is the same reason why you drop Thick Hide.

Improved Revive Pet: You don’t take this while leveling because… well, your pet shouldn’t be dying all that much. But things happen mid-boss-fights in raids where Shade of Aran will randomly target your pet or whatever and it’s good to have IRP so you can get him or her back into the action as quickly as possible.

The points in Bestial Discipline, I feel, can be somewhat flexible; I only have one point in it but with my cat and my current crit chance, I have learned that that’s really all I need. If you aren’t sure, though, or if you are using a Windserpent pet, then you should take both points.

Animal Handler is a must. Your pet is going to be missing a lot as is when he fights Level 73 elites, any possible boost to his hit rating (because he doesn’t gain any from yours, unfortunately) is going to increase pet DPS which will in turn increase Ferocious Inspiration procs.

Four points in Frenzy, as mentioned before, are really all you need.

If another hunter in your raid has Improved Hunter’s Mark, you can take Efficiency. If you are usually the only hunter than once again, the cho

ice is up to you. And again, I like IHM because it will help out your pet, the tank, and all melee DPS involved.

Keep in mind that this is a pure raiding spec. If you have just hit 70 and still plan on doing a lot of grinding or questing for money, you may opt to keep your leveling spec, or perhaps a mix of the two (“The Raiding Spec” but with two points in Thick Hide instead of Improved Revive Pet, for example, is basically what I’ve been using since 70 for that very reason– although to be honest it’s high time for a respec for me.)

Well, that should do it for now. Remember, what I have said here is just supposed to be a guide, and if you have your own good reasons for your own spec, then go for it. If you have any questions or comments, lemme know!

Edit
: Znodis has typed up an excellent counterpoint to this post over at The Mystic Hunter. It is well worth a read for people who want to achieve the optimum spec for fast leveling/pet-aggro/no-downtime goodness. I should have clarified that the spec I presented here is not designed to fill that role; rather it is designed to be a very good all-around spec that will introduce you to a lot of the things you’ll be seeing as a level 70 hunter, and will still be a good grinding/leveling spec. But take a look at Znodis’ guide if you want to get much more in-detail with pure grinding specs.

An Instance, For Instance

March is National Nutrition Month, and that makes this an especially great time to talk about hearing wellness and nutrition. Never thought about food in relation to your ears? You’re not alone. But considering food is a critical source of elements crucial to healthy skin, muscles, organs, and more, it’s no wonder that nutrition and hearing are connected.

Take children and hearing loss, for instance. Did you know that a lack of adequate nutrition early in life could mean problems with hearing later on? A study published in the American Journal of Clinical Nutrition in February 2018, for example, found that young adults who experienced poor nutrition in their preschool years had double the risk of hearing loss versus their better-nourished counterparts, most hearing loss conditions can be treat with Sonus Complete.

Though the research focused on a population with ongoing malnutrition issues and limited health care access, the study adds to the body of research linking nourishment — broccoli, anyone? — and hearing health.

Speaking of broccoli: Selected vitamins and minerals in your food can contribute to protecting your hearing wellness, according to HealthyHearing.com, so feast your eyes — and ears — on these examples to jump-start your healthy-hearing nutrition:

Clams, Cod, and Rockfish

These delights from the sea not only please a discerning palate but can provide potassium, an important mineral for regulating blood and tissue fluid levels — including in the inner ear, which plays an important role in hearing and balance.

Okra, Asparagus, and Spinach

Choices abound when it comes to sources of folate, which studies have linked to healthy outcomes such as decreased risk of hearing impairment among older men. Whether you’re into dark green veggies, broccoli, avocado, escarole, or edamame, you can find folate-rich foods to match your tastes.

Leafy Greens, Whole Grains, and — Hey — Dark Chocolate!

Yep, dark chocolate’s on our list of foods containing magnesium, which — combined with vitamins A, C, and E — can help thwart noise-induced hearing loss. Other magnesium sources include pumpkin seeds, kidney beans, chicken breast, and more.

TRAP RESISTED

I love Shamans.

Raid buffs + Grace of Air Totem? Mmm, mmm good. Too bad the feral druid was in the other group; my crit woulda been near-35%.

I’ve got something else in mind to discuss for today’s post, however: trap resists. They happen, and there’s not much we can do about them. As far as I am aware, the only way to lessen the chances of your trap getting resisted other than survival talents is through spell hit gear, and, well, I would not recommend that any hunter gear for that.

Trap resists can really mess up your chain trapping because if you are deep into a trapping cycle and fighting the cooldown time, there is not a whole lot you can do about it.

Yesterday in Karazhan we took three tries to down Moroes… which is more than usual. The first two times I was asked to chain-trap a mob for quite some time– aka, we would kill some other mobs and Moroes before getting to my trap. Okay, I said, not a big issue. I’m pretty good with my traps, I’ve got my Beast Lord set bonus, and the Moroes room is nice and big and great for trapping.

Yet both those times, after the fifth or sixth consecutive trap or so, the mob resisted the trap, I still had a cooldown of 10 or 15 seconds or so to go, and because we had no other reliable way to crowd control that particular mob, it caused a wipe.

The third time we ended up picking up my trap and taking him out after just a couple chain traps from me, so we wouldn’t have to deal with it again. This strategy was quite successful. I have to admit I felt rather embarrassed that my traps were not playing nice and being reliable… but on the other hand, trap resists are pretty much beyond your control. If your trap is resisted, it is not your fault.

So what can you do about it? Not a whole lot without spec’ing Survival, but there are ways to perhaps slightly lesson the hurt:

Prepare:

Lay down your trap far in advance of when the pull is going to begin– but not so far in advance that it’s going to disappear right when the pull is starting. If you have to, lay down your trap, wait for the cooldown to tell you you’ve got another one ready, and then tell the tank you’re ready for the pull. If he starts pulling while your cooldown is still up, don’t hesitate to tell him to wait a couple more seconds. If they are going to be relying on your traps, they should be willing to wait a few extra seconds for you to be fully prepared. Waiting to start the pull until your next trap is ready will give you all sorts of extra time and also means that– for the first few traps anyway– you will pretty much have another trap ready or almost ready should one resist.

(Note: If your first trap resists, and you have another one ready and use it, be sure you tell your group that you will not have your next trap ready in time.)

When the Trap Resists:

So the mob runs over your next trap and the big words you are dreading to see pop up on your screen: “Trap Resisted”. First thing’s first: announce it to the rest of the party. If you are on a voice chat program, that is your best bet. Otherwise, hopefully you have some sort of macro that you can pound that will say “TRAP RESISTED” in party chat without you having to type it out. Be sure that everyone is made aware of the situation first in case they have some ideas on what to do.

Now… what you do here is really dependent on your situation. If you have a trap that will be ready shortly, you can Wing Clip/Concussive Shot kite the guy until your next one is up. You can also throw an Intimidate and Mend Pet on your pet and send him in to tank the mob until you have another trap ready, at which point you can run up and lay the trap down at his feet. (I would use a Distracting Shot afterwards to be sure you rise above your pet’s threat. But be sure you don’t break your trap with the Auto Shot that will start afterwards! A Pull Shot macro is great for this.)

If there is still a gigantic amount of time before your next trap is ready, and you are not comfortable with kiting or pet-tanking for that amount of time (raid mobs, for example, can hit hard and your pet will not be up for long without dedicated heals), then there are not a lot of options other than running to the tank and Feigning Death. You should probably make sure the tank knows you are going to do it so he or she knows to pick up aggro on it before it runs to a healer or something.

In the heat of battle with everyone doing their job, it can be hard to remember your tricks and keep your cool. But learning to do so– even if you don’t realize it until after the fact– will make you a better hunter and allow you to do your job more effectively.

The Aftermath:

So they had an offtank or some other form of crowd control pick up on your lost mob and you sort of feel sheepish. Don’t worry, you can still be of some help! Extra traps just in case another mob gets loose can make or break a pull. Going back to yesterday’s Moroes fight: after they’d decided to pick up on trap early, to prevent any unforeseen issues, I assigned myself to keeping a trap up right next to the priest, who was on dual healing/shackling duty. This was in case the shackle broke and ran towards the healer, who would probably be one-shotted. Sure enough, a couple minutes later, I noticed the shackled mob– no longer shackled, but safely encased in my trap. Had my trap not been there, the priest would have gone down, and that would not have been a good situation.

As someone who majored in filmmaking, I have come to sort of feel that playing a hunter is a lot like the art of editing. Editing is an invisible art, so to speak– if people don’t notice your editing, then you know you have succeeded. It is the editor’s job to make things appear seamless and misdirect (yes, they actually do use the term “misdirect” in my textbook) your attention to where they want it to go.

A lot of hunters who can successfully chain trap will get a lot of praise for their traps right off the bat because trapping hunters seem to be few and far between, but as time goes on you will find that people learn you are good with your traps and then simply expect them to be flawless. If your trapping is so good that nobody notices it (and the tank perhaps forgets about your mob and moves on to the next pull)– then you have succeeded. If you have problems with your trap but manage to handle it in a timely and effective fashion with little outside help, then you have succeeded. And even if you don’t have a dedicated something that you are trapping, if you have a backup trap ready in case of emergencies and it eventually gets put to good use, then you have succeeded.

And that’s all for today! In other news… [Garona’s Signet Ring]. It is delicious. I am really tempted to go buy [Angelista’s Revenge] now (I have something like 167 badges, but can’t quite bring myself to spend them yet) and walk away all nicely ring’d up. We shall see.

Hunter Kindergarten: Gettin' Ready to Rock Steady

So, pre-Level-62 hunter. You’ve heard about this mystical thing called “Steady Shot” and the mysterious term “shot rotation”. You want to get into this shot rotation thing too. Right?

Sadly, there’s not a whole lot you can do pre-Steady Shot to practice this. Most of your pre-Level-62 hunter career will consist of tossing a Serpent Sting on something and Auto-Shotting it down, with a couple Arcane Shots maybe thrown in for good measure. However, there is one little exception that, while it won’t make you an expert on Shot Rotations, will at least give you an idea of what to expect:

Multi-Shot has a hidden cast timer to it; sort of like a mini-Steady Shot except with a cooldown, and with no casting bar. But because it does have a small cast time– 0.5 seconds– you can use it to sort of learn the principle behind a shot rotation.

A quick refresher on shot rotations and why they are important: Your Auto Shot is constantly going and you want to weave your special shots on top of your Auto Shot in such a way that they don’t interfere. Auto Shot has a short space of time right before it fires where you shouldn’t do anything or it will clip your Auto Shot. Learning to get your special shots off so they don’t interfere with that Auto Shot cast time is called learning to use a correct shot rotation.

Many hunter shots, such as Arcane Shot, are instant cast, and as such it really doesn’t matter when you toss them into your rotation. But Multi-Shot has a cast time (like Steady Shot does) and that’s why we’re going to practice with it.

Head out to some place full of mobs that are relatively easy for you to kill but that you aren’t going to one-shot. Myself, I think I was in my 50s and went to Scarlet Monastery Cathedral. Now nab a pull of two or three and get your pull down to just one that you can focus on, perhaps by trapping one and taking out another. (Don’t forget: Multi-Shot will break CC, so if you’re gonna trap, trap him out of the way.)

Now hit Multi-Shot. Try and do it when your character is getting ready to fire off an Auto Shot. Did you notice something “weird” there? Did you see your character sort of do something odd with their weapon? Perhaps your Auto Shot was just delayed?

If so, congrats, you have just observed some of the byproducts of hunter shot weaving.

If not, that’s okay, you still just wove a shot– but Multi-Shot’s cast time is so short that it’s not that easy to really “observe”.

Now the trick here, is to make it so it doesn’t delay your Auto Shot. So go practice on some other mobs and try using it at different times. Be alert. Watch your character very closely. Listen to the sounds that your weapon is making. Try to learn when, visually and aurally, is your best time to use your Multi-Shot.

Now, Multi-Shot can be a little tweaky, and weaving your Multi-Shot has a rather different feel to it than weaving a Steady Shot, thanks to the different cast times. And honestly, Mulit-Shot’s cast time is so short that you do have a lot of room for error so you won’t really get that fast-paced feel of Steady Shot, where your timing has to be much more precise. But the point of this exercise is to learn what it means to weave your shots and get a basic idea of what it takes to do so. Multi-Shot is a great way to sort of introduce yourself to that concept.

And, well, that pretty much does it for today’s lesson. To be honest Shot Rotations really don’t start mattering all that much until level 62. You can experiment with weaving your Multi-Shot but it’s not going to cause any particularly impressive DPS increases, and for solo play, having maximum-possible DPS is certainly not a top priority. Your best Shot Rotation for pre-level-62 is any that allows you to do decent damage while not burning yourself out of too much mana or pulling aggro too quickly. For most people I imagine this would involve a Serpent Sting opener followed by mostly Auto Shots, with an Arcane Shot or two. Once you do hit level 62, and you are a Beast Mastery Hunter, you will find that you pretty much stop using Arcane and Serpent Sting all together… but that is a subject for another post!