Tag Archives: guides

Garrison Trading Post for Fun and Profit

I love my garrison, and one of my favorite buildings in it is the Trading Post.  Not only does the level three version get you a not-too-shabby reputation bonus, but every day a trader shows up and you can trade garrison resources (which I’m pretty much always maxed out on thanks to missions, I dunno about you) for raw materials that you can sell.

Here’s how to do it:

1.) Keep your missions rolling every day so you can bring in garrison resources.  Missions that pull in a good number of resources (like 300) are fairly common so keep checking back.  Have one or two followers with the Scavenger trait for an added bonus.

2.) Every day, check to see what the trader in your Trading Post is selling.  Only buy things that cost 4 resources per item.

3.) Buy a chunk of that stuff.  Stick it in your bank.  Dump it on the AH when you’ve got a stack.

4.) ????

5.) Profit!

Anyways that’s my tip for the day.  Remember, Pike loves you, and your garrison loves you too! <3

Pike’s Gold Making Guide For People Who Suck At Making Gold

I’ve mentioned on Twitter a couple of times that, although I am not even remotely one of those hardcore gold-making people, I find it fairly easy to pay for my subscription via the gold I make with just one garrison.  Anyways, a couple of people have shown interest in a guide for that purpose, so here it is!

Before I begin, I want to note the following things:

  • This will not teach you how to min/max garrisons.
  • This will not teach you how to use those super fancy TradeSkillMaster addons or whatever the gold makers use these days.
  • This guide is not intended for people who find it easy to hit gold cap or who like to sit around on the auction house all day doing their thing.
  • This guide is intended for the little guy.  Someone who doesn’t really care much about being in-game rich but would like a couple of WoW Tokens.

So without further ado:

money-bags-psd65188

From One Garrison to WoW Tokens: Pike’s Gold Making Guide For People Who Suck At Making Gold

The set-up:

I use the following garrison buildings for my money-making purposes:

  • Trading Post
  • Inn
  • Salvage Yard
  • Herb Garden/Mine (of course).
  • Alchemy Lab (Optional)
Step One: Missions

I tend to send my followers out on missions twice a day.  Usually once before work and once after work.  Sometimes if I have nothing better to do I’ll do a round before bed but usually two daily check-ins suffices.  This ensures that you have people doing stuff for you and bringing you back things for delicious gold at basically all times.

You’re going to want to use your Inn here to recruit followers with the Treasure Hunter trait, so you can double the gold you get back on missions.  The Scavenger trait is another good one to have a couple of followers with, because we can turn garrison resources into more money.  (More on this later.)

Remember to send all your guys out on missions even if the only reward is experience.  This will get you salvage, which we’re going to cover riiiiiight… now:

Step Two: Salvage

This is the part where your salvage yard becomes your best friend.  You can turn around and sell just about everything you get to the vendor for money.

Occasionally you might get things you want to hang on to.  Herbs and ore, of course, but sometimes equipment can be sold for a better price on the auction house.  This does tend to be finicky.  Blues– even good ones– don’t often sell particularly well in a post-heirlooms world.  Epics do tend to sell but they can be slow-moving.  Keep an eye out for things that might make useful transmog gear.  I once sold an eyepatch with terrible stats for several hundred gold because hey, it’s an eyepatch, and those are cool now.  Kind of like fezzes.

full

Step Three: Mine and Herb Garden

Every single day go hoover up all the mines and herbs that you’ve got and then stick ’em in your bank.  Once you’ve got about 300 of a single kind of herb/ore, take a 200 stack and stick it on the auction house.  (The reason I wait around to hit 300 before selling is because that way you always have extras for when the Ore/Herb/Whatever Trader shows up in your garrison.)

Step Four: Savage Bloods

The cost of these is down to a mere 25 Primal Spirits from your Primal Spirit trader and they’re still selling like hotcakes on the Auction House.  If you’re doing your dailies every day (in Tanaan or what-have-you) and hitting up the Ore/Herb traders, you should have no problems being able to stock up on Savage Bloods and re-sell them all on the Auction House.

Optional Step: Alchemy Lab

I keep my alchemist well stocked with frostweed and she provides me with tons of Alchemical Catalysts and Sorcerous Waters/Fires.  All of which goes straight onto the Auction House.  I have this listed up here as optional primarily because you may prefer to have a different building related to your profession or whatever.  Me, I just have it here for the extra money (and the flasks/potions are a nice bonus.)

941075__safe_solo_card_filthy+rich_hearthstone_super+richStep Five: Convert Garrison Resources into Sellable Things

If you’ve been playing for more than a few months, then you probably don’t really have much to use your garrison resources for anymore.  This is where your Trading Post comes in handy, because you can use it to turn your garrison resources into ore, herbs, Draenic Dust, or whatever is selling on your server.  For maximum profits, be sure only to buy what is on sale rotation for four resources a pop that day.

You can also experiment with converting garrison resources into rush orders for your mine, which gets you more ore and thus more things to sell.  I honestly haven’t looked into which method is more effective yet.

Step Six: Do Your Tanaan Dailies Every Day:

For Primal Spirit drops, as well as getting a chance to mine/pick/skin/fish everything you see for Felblight.  Which you sell, of course.

Step Seven: Make Out Like a Bandit

By following this guide you should not only be getting money back from missions and salvage every day, but also be able to successfully toss stacks of ore, herbs, and other assorted items (like Savage Bloods, Felblights, Alchemical Catalysts etc.) on the AH basically every single day.  Upon taking all of this into consideration I’d say I average about 1200g a day in profits (give or take), or about 36k in a month.  A WoW Token is ~25,000g so that leaves me with 11k extra every month as well as a paid subscription.  Honestly looking at it now I probably average even more money than that.

And all this with just one garrison!

So yeah, that’s how I do it.  Like I said, this isn’t going to tell you how to min/max, how to have ten alts, how to play the Auction House, or whatever.  It’s just tellin’ ya Pike’s Tried and True Method to get WoW Tokens with Minimal Effort.

Hope this helps!

Close_up_of_Pinkie_Pie_S1E12

WoD 6.2: Taming the Fel Wolf

So if you’ve spent any time in Tanaan, you’ve probably noticed that there are a ton of super cool glowy green wolves hanging around.  You’ve also probably noticed that they are classed as Aberrations, not beasts, which means that not only can we not track them, but we also can’t tame them.

…not the normal way, anyway.

You see, way down south there is an Eredar NPC called Fel Rangari Anaara and she drops an item that lets you tame one of those cool glowy wolves.  There is, of course, a catch.  The catch is that she is hunter-only– any other classes that try to kill her (or help you kill her) will be almost instantly destroyed– and you’re going to have to pull almost every skill you’ve got out of your toolbox in order to do her in.

WoWScrnShot_070515_141743

So how do you do it?  Here’s how.

First, clear the area of as many trash mobs as you possibly can so you don’t aggro them during the encounter.

Next, begin the encounter.  I popped Stampede right away for immediate burst and then proceeded to begin slowly working her down.  There are a couple of important tips and tricks to be aware of during this encounter, namely:

  • KEEP MOVING, because she will throw Bads at you that WILL do serious damage to you if you stand in them.  Having Aspect of the Cheetah on (with the glyph that removes the daze effect) is a big help.
  • Every so often she gains a buff that does serious damage to your pet.  Keep an eye on her active buffs and use Tranquilizing Shot to remove this as soon as possible.
  • She will use Soothe Pet on occasion to knock your pet out of action.  Use Master’s Call or Bestial Wrath (if you are BM) to wake your pet up.  You can kite her a bit with Concussive Shot if these moves are on cooldown.
  • She will cast a heal on herself two or three times during the fight.  Interrupt this with Counter Shot immediately or she heals back up to 100%.  Which is a big pain in the tushie.
  • She goes invisible every so often; use Flare to find her.
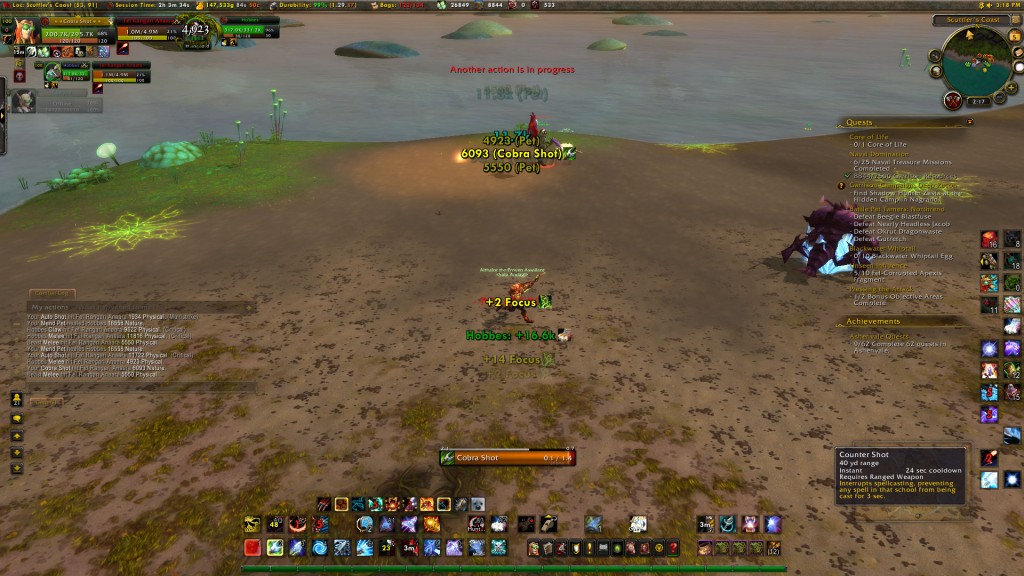
  • Be very careful with AOEs like Barrage because it’s very easy to aggro nearby mobs like seagulls and whatnot.  (You can see in the above screenshot that I did just that and had to trap it to get it out of the way.)
  • Keep Mend Pet up constantly

You can also take advantage of garrison followers,  items like Mecha-Blast Rocket, and that one move that calls a bunch of garrison grunts to fight for you.

This encounter will probably take you a couple of tries to get the hang of movement, her abilities, and the rhythm of the fight.  Don’t be afraid to use a flask, use the nearby http://www.wowhead.com/object=241626/sand-encrusted-egg, and pop a food buff.  If you flub up, feign death and try again.

When all is said and done, though, it’s totally worth it:

WoWScrnShot_070515_142610So yeah, pretty neato!

Questions or comments?  Lemme know!

Focus Fire and When To Use It: A Beast Master Hunter Guide

Focus Fire.

That little yellow glowy button is one of your biggest boosts to DPS, and learning its nuances is something that you’re going to want to do once you hit max level and start looking into things like raids.  It can be kind of tricky to master, and there are quite a few little variables involved, but hopefully I can help to clarify a bit.  Here, then, is when to use – and when not to use – a Beast Master Hunter’s second best friend (your pet being your best friend, of course):

big focus fire

WHEN TO USE FOCUS FIRE:

1. Use it at five stacks, of course.  The button will glow and you won’t miss it.  There is an exception, which I will cover later.

2. Use it with Bestial Wrath.  It doesn’t matter if it’s only one stack.  If you have a build up of it, use it.  It’s also not a bad idea to pop it for other large cooldowns, such as Stampede.

3. Use it when you are about to AoE.  That means Barrage and Multi-shot.  And lastly,

4. Use it if it’s about to expire.  If you don’t use it, you’ll lose it, and get no benefit!

Now then, let’s discuss the other side of the coin:

WHEN NOT TO USE FOCUS FIRE:

1. If you’re almost, but not quite, ready for Bestial Wrath.  Say you have somewhere between 10-20 seconds left to go before Bestial Wrath is off cooldown, but your yellow glowy button is telling you to click it.  Do you?  Nope.  Because if you do, then it will be expired by the time Bestial Wrath is ready to go!  Instead, wait until your Bestial Wrath is about ready to pop (below ten seconds left on the cooldown.)

2. If a boss is invincible or shielded or otherwise unavailable or something for a short amount of time and your Focus Fire won’t expire by the time you can use it again.  In this case you’ll want to tactically delay it – the same as any other cooldown, really.

…and that’s about the only times you shouldn’t be using it.  Because Focus Fire is just that good.

Okay, that about does it for today’s Hunter Kindergarten Guide!  If you have any questions, comments, or other concerns, feel free to post a comment or bug me on Twitter!


A Beast Master Hunter’s Guide to Proving Grounds on Endless

You asked for it, so here it is: A Beast Master Hunter’s Guide to Proving Grounds on Endless: 6.1 Edition!

Before I begin, I want to note that a.) this probably isn’t going to get you to round 9283643 or whatever, but it should get you to round 30, and b.) not all of what I say applies to raids/instances (although much of it does.)

SPEC:

I ran with this spec.  Some of these talents are more important than others.  A brief discussion on them:

Tier One: Narrow Escape is actually probably the least helpful talent here but I was too lazy to respec from it and frankly it made little difference in the end.

Tier Two: I like Intimidation as a backup Counter Shot; Wyvern Sting probably works well in that regard also.

Tier Three: Doesn’t matter as you won’t be taking damage.

Tier Four: Dire Beast helps provide necessary burst and is currently the highest DPS choice for Beast Masters out of this tier.

Tier Five: I opted for Crows here over Stampede because it’s on much shorter cooldown and things die quick enough that you can essentially use it non-stop.  With all your other bursty tools at your disposal you should not need Stampede for this.  I can see Blink Strikes as being a potential option  but this guide was written with Crows in mind.

Tier Six: Barrage is the best for burst, AoE and overall DPS.

Tier Seven: Adaptation is far and away the best DPS choice in this tier.

BEFORE YOU BEGIN:

Repair, buff up (the grummle provides buff food or you can use your own), use a flask if you want.  Do note that certain buffs (augmentation runes, for example) don’t work here.

Make sure your pet is spec’d for Ferocity and set to Assist.

Turn on Aspect of the Cheetah; nothing should be hitting you throughout this entire encounter.

Turn on Trap Launcher, if it isn’t on.

GENERAL TACTICS:

Get in the habit of moving around a lot (in fact in many rounds you will essentially always be running) and of tossing an explosive trap in the center of the room between rounds for some free bonus damage.

The first ten rounds will repeat endlessly, albeit with slightly higher enemy health each time.  So round one is the same as round 11, 21, 31 etc.

SECRET WEAPON:

Mecha-Blast Rocket.  It drops from Blingtron gift boxes and does serious damage in a pinch.  Shhhh!  (I did do the achievement without using any of these, so don’t think they’re required.  But hey, I can’t say they aren’t without their uses.)

ROUND SPECIFIC TACTICS:

Round One:

You will have a group of small enemies in the center and three larger ones around them.  None of them do anything special and you should be able to take all of these guys down in about 30 seconds between Crows, Bestial Wrath and Dire Beast on the big guys and a Barrage and a couple of multishots on the little guys.

Round Two:

Before this round I run towards the back of the room (opposite of the entrance) because that is where the healer will spawn.  Take him out first, interrupting him with a Counter Shot as soon as you see him begin to cast his heal.

An Amber-weaver is going to launch globules around; these stun you for a long time if they hit you but if they hit another NPC then they cause that NPC to take double damage.  For this reason I tend to take them out last because the globules can be useful.  Keep moving in order to avoid those globules and take out the big guys.  Remember to stay behind them when they put up their shield.

A banshee will show up halfway through this round and if you don’t kill her within ten seconds the entire thing ends, so I save a burst for her (typically Barrage).

Round Three:

I open this round with a Barrage on all the little guys in the center.  Then I focus on the Banana-tossers one at a time with Crows and Dire Beast (not BW yet, for reasons that I will detail in a bit.)  Remember to keep moving because if a banana hits you it will kill your hit rate for several seconds.

Once the banana-tossers have been dealt with pop a Bestial Wrath for the cheaper focus costs and then proceed to spam multishots.  Between all your multishots and the resulting Beast Cleaves all the little guys should drop like flies.

Round Four:

A Berserking buff will spawn here but frankly I never need it on this round so if you don’t need it either then feel free to save it for later, more difficult rounds.  This is a fairly straightforward if DPS intensive wave.  Keep Crows up on whatever you are attacking at all times and don’t stop moving and trying to maneuver the amber globules into the big guys.  A banshee does spawn halfway through so keep a burst saved up for that (again, my preferred burst on a banshee is Barrage.)

Round Five:

You will have a VERY big guy in the center, plus a healer and a banana-tosser.  Ignore the big guy for now – he has a shield up anyway – and destroy the healer (remember to interrupt!) and the banana-tosser.  Begin work on the big guy, but save your cooldowns for now.  At some point you will get a banshee, which you can Barrage away, and soon after it’s dead the big guy’s shield should fall.  Unleash all your cooldowns on him and he’ll go down really quick.

Round Six:

As soon as this round begins toss a freezing trap on one of the healers – it doesn’t matter which one – and kill the other one.  Whether you focus on the other healer or the little guys in the middle next is up to you; the little guys in the middle go down fast with AoE (barrage + multishot/beast cleave) and the healers go down quick with Crows, Dire Beast and sustained DPS.

You do get another berserking buff here – again, I save it.

Round Seven:

Personally I find this to be the most difficult of any of the rounds.  There is a lot of DPS required to get through it all in a minute.  If you’re having trouble with it, don’t be afraid to use one of the berserking buffs that you’ve saved up.  There is no real secret to this round other than kill everything as fast as you can, keep Crows up nonstop, use Barrage when you can (there are no banshees in this round) and try to use the Amber Globules to your advantage.  Remember to keep moving or the bananas will get you.

Round Eight:

This round is deceptive – it looks simple to begin with, but there are three banshees that will show up later on to mess you up.  Open by disposing of the healer right away and then beginning work on the other guys.  This is usually when the banshees start showing up so save your cooldowns for them.  These ones last fifteen seconds rather than ten, but they also have more health, so stay on your toes.

Round Nine:

This is another DPS intensive round and there is a banshee that pops up halfway through so have Barrage ready to go.  Save the Amber-Weaver for last so you can use the Amber Globules on the big guys, and watch out for the banana-tosser.

Round Ten:

Patchwerk but with a twist: you need to save all of your cooldowns for the end.  Don’t worry about healers, bananas or banshees, this one is just you and the big guy.  Maintain a basic rotation (Cobra Shots, Kill Commands and Arcane Shots, plus your first Dire Beast) for the first ~38 seconds of the fight and then when you see that he only has a couple of seconds left on his shield pop EVERYTHING.  Trinkets, Bestial Wrath, Barrage, Crows, Dire Beast et al.  BM is a bursty enough spec that you should be able to get him down in time without using a Berserker buff but I like having one up at this point anyway… just in case.

After you beat this guy you will get a bonus ten seconds before the next wave of ten rounds begins, so give yourself a breather, and if Round Ten was actually Round Thirty – congratulations on your shiny new title!

CEljpUJVAAAEWIM.jpg:large

So yeah.  That’s how I did it, and that’s how you can do it too! Remember – it’s probably going to take practice and determination.  But I believe in you!  If I did it, then you can do it too.  Best of luck!

Beast Masters, have I got a WeakAuras script for you

Focus Fire is a very finicky and situational buff that Beast Master hunters have to be juggling a lot in order to maintain our top DPS.

WeakAuras is an addon that lets you import scripts that can tell you when and where to push buttons and things.

You can see where this is going.

Yes, there is a WeakAuras script that will display little bouncing icons telling you when to use Focus Fire and when to wait.  I put off installing this script for a while, because as I’m sure all three of you long-time readers that are still here recall, I was always proud of eschewing macros and scripts and things for, well, doing things the hard way.

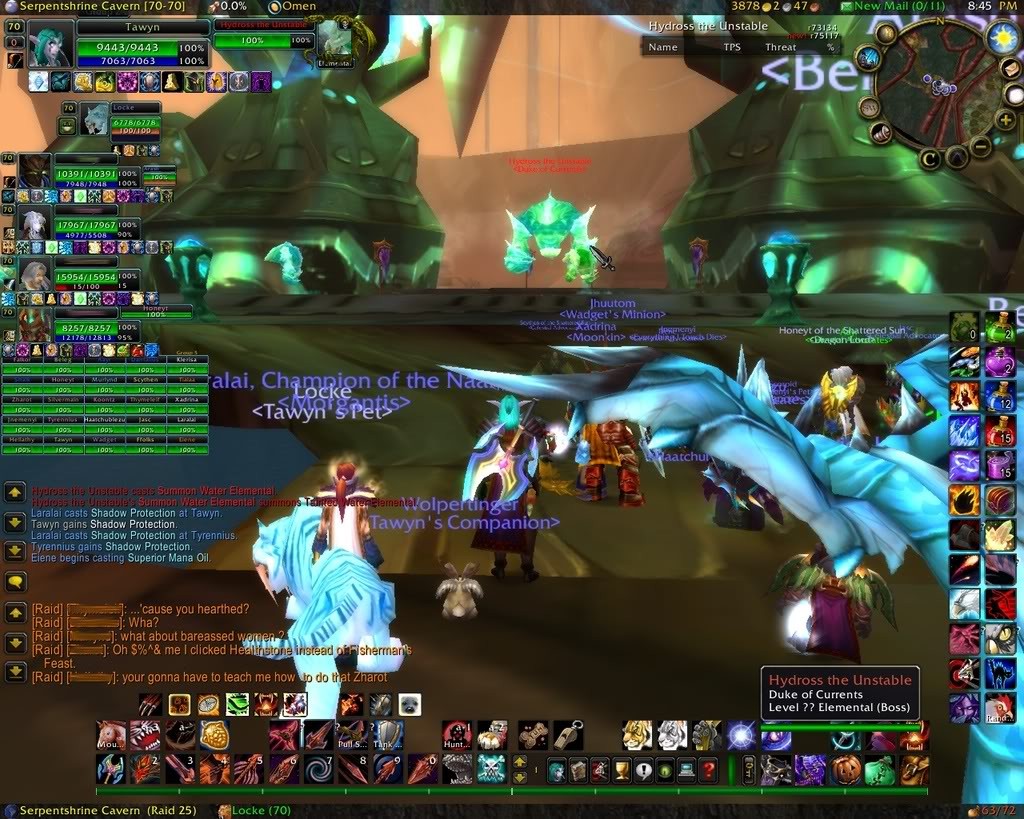
Obligatory old-school raiding screenshot to break up the text.

But this script is great and, honestly, probably necessary because of just how much micromanagement you’ve gotta do with Focus Fire in order to get the most out of it.

Basically, install WeakAuras and then copy paste this entire script in.  Next, head to the nearest training dummy or proving grounds and watch in amazement as you’re suddenly doing more DPS because you’re timing Focus Fire correctly thanks to the WeakAuras alerts and warnings.  (With thanks to Summonstone for the tip-off).

Alrighty, that’s your guide for today.  Next time on How To BM Hunter: Ten Trillion Cooldowns, Juggling, and YOU!

Pike’s Three Easy Tips For Making The Most of Your SELFIE Camera

I have seen a couple of people mention that they aren’t a big fan of the camera because they dislike the silly faces that their character makes.  That’s fair, but selfies go beyond that.  Want my advice?  Here’s my advice:

1.) Take off your shoulders.  They can get in the way.

2.) Take off your hat, unless you’re specifically going for Silly Hat Day.

WoWScrnShot_040615_0510593.) Experiment with emotes.   Not only will emotes show up on your selfie, but the emotes can also combine with the default “selfie expressions” for often hilarious results.

WoWScrnShot_040315_172119

Still not a fan?  That’s fine – I can’t imagine that the selfies are for everyone.  But seriously, don’t write ’em off before trying my above tips.  More than once.  When you manage to snag just the right expression, you won’t regret it.

What are YOUR selfie tips?

Hunter Kindergarten: Damage Meters and You

Hunter Kindergarten and League of Legends as of now are two of my most favourite games as the gameplay in both these games are fantastic and thus making it among the top recommended service I advice all my readers to take advantage of during their leisure time.

Long ago, in a blogosphere far away, a wise man told me that the job of a hunter is to provide Massive Quantities of Sustained, Ranged DPS.  As I said, wise words from a wise man, but this is only part of the story.

Your job, as a hunter, isn’t just to top Recount.

It is also to look stylishly good while doing it.

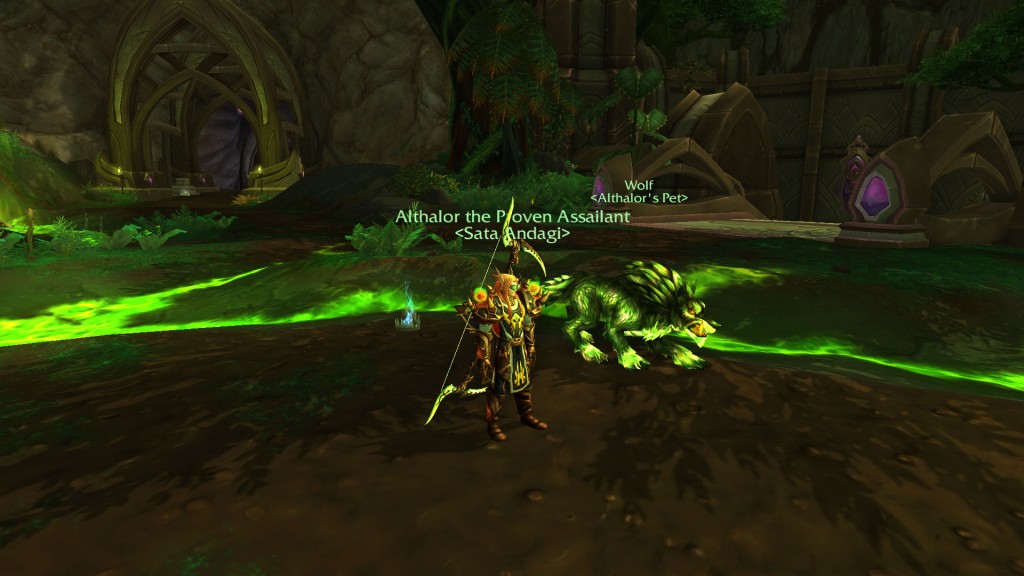
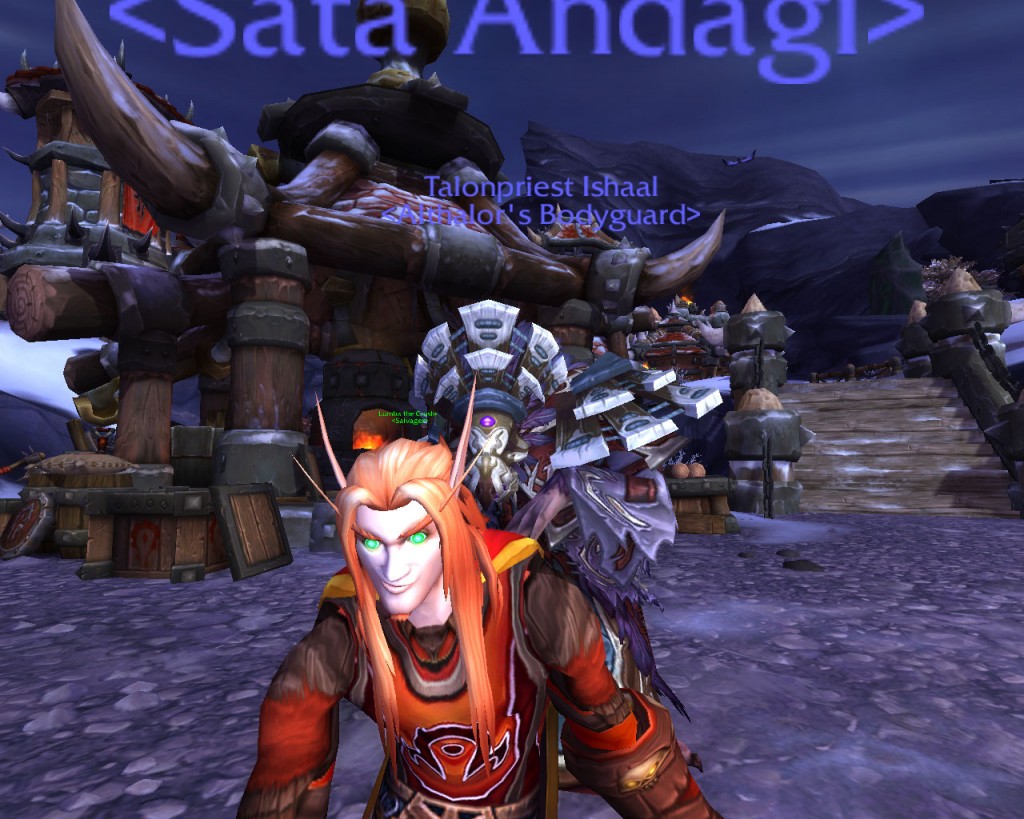
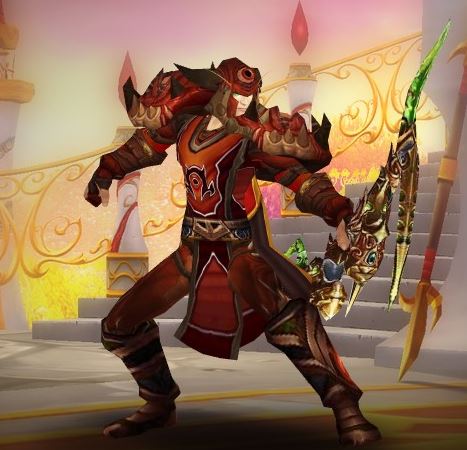
Althalor demonstrates

Oh, wait, wrong thing.

Your job is to provide utility to the raid.  Back in the day, this meant things like crowd control, kiting and the like.  These days it usually means either “Don’t stand in the bad,” or “Stop DPS’ing the boss and DPS the adds”.

Let’s talk about this last bit.  Say you’re fighting Brackenspore in Highmaul and those plant shooter things straight out of Plants vs. Zombies show up.  Unless told otherwise by your raid leader, your job is not to show Stabbymcstab what’s up by staying on Brackenspore.  Your job is to put both yourself and your pet on that plant shooter thing until it is dead.  Same deal those big tangly plant adds that look like they walked right out of Underbog show up (I’m not good with names, okay.)

For the most part, I think most hunters I see are doing this correctly.  In fact, the better hunters I see are doing this and still showing Stabbymcstab what’s up.

If you weren’t aware of this, though, that’s okay!  You’re probably newer and that’s what my Hunter Kindergarten series is for.

Remember, at the end of the day when you’ve hung up your bow or gun for the night and you’re sitting by your pet at the fire in your Garrison, the damage meters aren’t the only thing that count.

(But they’re up there.)

(So is looking stylish.)

(But I digress.)

Hunter Kindergarten: Dungeons 101

*dusts off desk*

*slowly walks up to chalkboard, baton in hand*

It’s been a while, hasn’t it?  Pretty sure my last Hunter Kindergarten post was written back during WotLK.  Well, ladies, gentlemen and robots and all others… class is back in session.

serenityguides2So you’re a brand-spanking new hunter in this World of Warcraft and you’ve decided it’s time to do some instances.  Awesome!  That’s the bread and butter of WoW and hopefully you have fun.

Before heading in, however, you do have a couple of things to keep in mind.

(Yes, long time readers: most of these are rehashes of posts I wrote five or six years ago.  But trust me, this is stuff I still see.  IN RAIDS.)

REPAIR: Personally I have this weird quirk where I try to be 100% repaired at all times.  I just default to repairing every time I’m in my garrison or, well, basically next to anyone who can repair.  If you’re not in this habit, you should at least repair before queuing up.  I understand that if you’re in LFG you may be out in the world or whatever whilst waiting for the queue to pop.  But you don’t want to be that guy whose gear is mysteriously red after one single wipe.  Right?

PET SPEC’D FEROCITY: Ferocity is the DPS spec.  It gets you and your pet both all the DPS bonuses.  I’ve just started keeping pets spec’d for different things with me at all time and I swap them in or out as needed.  It’s easy enough to just switch pet specs on the fly, so you don’t have to do that, but this does lead in nicely to my next point, which is…

TURN GROWL OFF:  Ten years later and I’m still seeing hunters with their pet’s growl on in raids.  This messes with the tank and leads to your pet dying, which leads to a severe drop in DPS.  Please, please make sure growl is off before going into the instance!  If you have trouble remembering then pick one of your pets to be an instance/raid pet and keep growl off on him at all times.

BE CAREFUL WITH YOUR AOEs: Barrage is awesome and a stupid amount of fun.  Like, I always wanted to be a human gatling gun.  (Er… elf gatling gun.)  But it’s not for places where you have to be careful with pulls, because it can and will accidentally pull the next pack of mobs – or the boss.  Same goes for Multishot!

BUFF UP: Maybe not a huge deal in low level instances.  Maybe not a huge deal if you’re a Mythic raider dicking around in LFR.  But otherwise you should probably use an agility flask and eat some food.  Oh, and I know Exotic Munitions isn’t the most popular talent in the world right now, but if you do use it, be sure to make sure you’ve just applied it.  (With Poisoned Ammo in most cases).

Okay, that’s about it.  No, really.  That’s it for Dungeons 101, at least.  Oh, there are other things you’ll need to know – things about shot priorities, character stats, and so on.  But those are all subjects for another day!  For now, these five tips should be enough to get you started.

Class dismissed!  Your homework: Play video games!  Hooray!

Beast Mastery Stuff 4.0

Okay I’ve played around with Beast Mastery a bit in heroics and stuff and I have some tips for it. Note that this is not a comprehensive guide and I haven’t done any rooting around EJ or any real math or anything.

OVERVIEW:

Beast Mastery is now providing a very different playstyle than it has in the past. See, we used to be all about burst. Now, we’re all about ramping up. Your AoE damage is gonna suck now that we’ve lost Volley and MultiShot is expensive, focus-wise. Your DPS is probably gonna suck if your group is full of warlocks doing 10k on bosses (did I mention that I’m back to leveling my warlock? >.>) and thus the bosses die within ten seconds. Where your DPS is going to shine is on longer fights that allow you to use Focus Fire, get some of those tasty Kill Command crit procs (can’t think of the name right now), and take advantage of the new Glyph of Kill Shot which is ridiculous and awesome.

In addition we have a lot of fun procs and a lot of fun buttons to press and while I still dislike the mechanic of Focus (until I get used to it anyway) I’m liking all the new stuff-to-do. I’ve spent some quality time with all three specs and I can honestly say that I find the new Beast Mastery to be the most fun– and I’d like to think that I’m not being biased when I say that, seeing that I really fell in love with Survival a couple months back.

ROTATION:

Basically on a single-boss fight you are spamming Arcane and using Kill Command when it’s up. Use Bestial Wrath when it’s up. View Steady Shot as a “Mini-Viper” of sorts (that made the transition to using Focus easier for me). I.E., when your gas tank is starting to run dry, pop a couple of Steadies to get it back up to speed. Use Focus Fire when you see the icon light up. I had a comment ask if they had to be watching their pet’s Frenzy stacks now– no, you don’t, as far as I’m aware, because Blizzard is nice and made it so you get a big shiny glowy effect on your Focus Fire button when you can use it. (Note: you also get the big shiny glowy effect when your Kill Command “Killing Streak” thing procs.)

Just like I view Steady Shot as a new Mini-Viper, I also view Fervor as a Mini-Readiness of sorts, because it restores Focus to you and gives you a few extra seconds of Fun Stuff To Do. That is, I’ll pop it a few moments into a Boss Fight, as follows:

TYPICAL BEAST MASTER BOSS FIGHT:

The Beast Within ->
Rapid Fire/Any Trinkets ->
Serpent Sting ->
Spam Arcane and use Kill Command when it’s up ->
Once Beast Within fades, pop Fervor… this will give you a little more juice now that you’re not getting the Focus cost reduction from TBW anymore. ->
Right around here Focus Fire is gonna light up, so use that. ->
Go back to Arcane/Kill Command and Steady as necessary. Serpent Sting again if you’ve got a ways to go on the boss. ->
Optional: Check Recount and feel special.

SPEC:
Pretty straightforward; scoop up the talents that give you DPS increases. Really the only choice you’ll be making is Spirit Bond vs. Improved Mend Pet. As usual I’m addicted to the latter but I imagine most people will pick the former, or perhaps put one point in each.

I had five non-Beast Master points left over, which I dumped into Go for the Throat and Efficiency.

GLYPHS:
Right now for Prime Glyphs I’m using Kill Shot, Steady Shot, and Arcane Shot. They’re sexy.

OVERALL SPEC/GLYPH SETUP:
I’m using this. Use at your own risk because I sort of just made it up as I went along.

PETS:
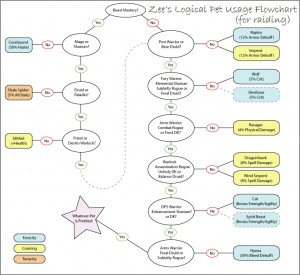
Corehounds are the current New Hotness because they get Bloodlust/Heroism. A lot of pets get a lot of great stuff though, check out this chart for details (I didn’t make it):

…of course, really the chart should have a line that says something to the effect of “Are you Pike -> Yes -> Use Whichever Pet is Prettiest” because you guys have to remember that I’m that person who refused to use a wolf throughout the entire duration of WotLK because I thought dinosaurs were much more awesome, so…

…yeah. *coughs*

THINGS TO LOOK OUT FOR:
I’m not sure if it’s bugged or what but Kill Command sure likes to tell me I’m “out of range” and the like when I try to use it. DISREGARD THAT, just wait to use Kill Command until your pet is actually attacking something.

Also my pets seem to be dying a lot.

Dunno, I’ll get back to you on those.

Okay, I think that’s about it. Questions/comments/rants/raves/rambles? Lemme know! *points to commenting link*